For most truck and SUV owners who want both towing support and daily comfort, a vehicle-specific air ride kit tailored to your primary use case is the right call: digital management for show builds or mixed daily/towing duty, and pressure-based or solenoid kits for occasional or regular towing without the extra electronics. Start by confirming your vehicle’s GVWR (the federal gross vehicle weight rating that sets your legal payload limit), then pick your use case, then choose the kit tier and configuration matched to your needs and priorities.
Three quick steps before you buy:
- Check fitment first. Use a vehicle-specific selector to confirm brackets, shock compatibility, and wheel clearance for your year, make, and model.
- Decide your primary use case. Towing and hauling, daily comfort, or show/custom stance each point to a different kit tier.
- Match the tier to the need. Basic pressure kits for occasional towing, solenoid manifolds for more frequent use, digital/ECU systems for show builds or mixed daily/towing duty.
Ozkonic Kustomz sources kits directly from vetted manufacturers and runs fitment checks on every SKU, so you’re not guessing about compatibility. As DrivingLine notes, air bags improve ride stability and load-leveling while allowing near-stock comfort when deflated, but they do not increase your factory GVWR or legal towing limits. Keep that distinction clear before you order.
Key Takeaways
Choosing the right air ride suspension kit comes down to matching kit tier and configuration to your primary use case, verifying component specs before purchase, and buying from a supplier who can confirm fitment for your exact vehicle.
| Point | Details |
|---|---|
| Match kit tier to use case | Choose kit tier and configuration based on your primary use case: basic pressure kits for occasional towing; solenoid manifold kits for regular towing; digital ECU for show or mixed daily/tow duty. |
| Verify specs before buying | Check compressor CFM, duty cycle, tank size, max bag PSI, and DOT-rated airlines on the product page. |
| GVWR does not change | Air kits improve level and control but do not increase your legal payload or towing limit. |
| Maintain minimum bag pressure | Never leave bags fully deflated; keep at least the manufacturer’s minimum PSI to prevent creasing and early failure. |
| Ozkonickustomz for fitment-checked kits | Ozkonic Kustomz offers vehicle-specific air suspension kits with fitment verification, direct manufacturer sourcing, and US-based support. |
Table of Contents
- Which air ride suspension kit fits your use case?
- What does a complete air ride kit actually include?
- How do the three control system tiers compare?
- 2-way vs 4-way: which configuration do you need?
- How to pick the right air ride kit for your vehicle
- What does air ride suspension cost, and how long does installation take?
- Maintenance, common failures, and what your warranty should cover
- Why buy from Ozkonic Kustomz?
- Does your vehicle’s suspension actually fit the kit you’re considering?
- A note from the Ozkonic Kustomz shop
- Get your air ride kit from Ozkonic Kustomz
- Sources
Which air ride suspension kit fits your use case?
The right kit depends almost entirely on what you’re asking it to do. Here’s how the three main use cases map to kit types:
- Towing and hauling: Vehicle-specific air helper springs or load-leveling kits with an on-board compressor and at least a pressure-based manifold. These kits mount to your existing rear suspension and inflate to compensate for tongue weight and payload. Look for heavy-duty vehicle-specific options with higher service ratings and clear fitment documentation. According to Pacbrake’s comparison of towing support options, air bags are the best choice for variable towing because they adjust to different trailer weights and tongue loads, something bump stops and add-a-leaf kits simply can’t do.
- Daily driver / ride quality: Vehicle-specific kits that include matched shocks or struts and offer pressure or ride-height control. When deflated, a well-matched kit rides close to stock. When loaded, you dial in the pressure and the truck levels out. This is the most versatile setup for owners who aren’t building a show truck but want better control.
- Show / custom stance: Full four-corner digital management with dual-tank or fast-fill setups. These systems let you save height presets, drop the vehicle at a show, and raise it back to drive height in seconds. Fill speed and corner-by-corner precision matter here more than towing capacity.
Pro Tip: Always confirm shock compatibility before ordering. A bag kit that doesn’t include matched shocks may require you to source them separately, and mismatched shock valving can undermine the ride quality the air system is supposed to deliver.
What does a complete air ride kit actually include?
HowStuffWorks explains that a full air suspension kit typically includes air springs, a compressor, airlines and fittings, a receiver tank, a valve block or manifold, a controller, and matched shock absorbers, with prices varying widely depending on features. Here’s what to verify on the spec sheet for each component:
| Component | What to check | Why it matters |
|---|---|---|
| Air springs (bags) | Max PSI rating, bag diameter, mounting style | Determines load capacity and fitment to your suspension geometry |
| Compressor(s) | CFM output, duty cycle percentage | Higher CFM fills bags faster; duty cycle tells you how long it can run before needing to cool |
| Receiver tank | Volume (gallons or liters), working PSI | Larger tanks mean more air reserve and faster fills without cycling the compressor |
| Manifold / solenoids | Number of ports, PSI rating, response time | Controls which corners fill or exhaust; quality solenoids reduce leak risk |
| Controller | Type (manual/solenoid/digital), preset capability | Sets how precisely and quickly you can adjust ride height or pressure |
| Airlines and fittings | DOT-approved material, diameter | DOT-rated nylon or polyurethane line resists cracking and UV degradation |
| Shocks / struts | Matched valving for air spring rate | Mismatched shocks cause harsh ride or excessive body roll even with correct bag pressure |
| Sensors | Ride-height vs pressure type | Height sensors maintain a set position regardless of load; pressure sensors maintain a set PSI |
| Hardware / brackets | Vehicle-specific vs universal | Vehicle-specific brackets reduce fabrication time and improve alignment accuracy |
When you’re on a vendor’s product page, four things must be visible before you add to cart: a fitment selector, installation instructions (or a link to them), warranty terms, and the country or facility where the kit is manufactured. If any of those are missing, keep looking.
How do the three control system tiers compare?
Air suspension control systems fall into three tiers: manual paddle valves, solenoid-based manifolds, and digital/ECU management with app or preset control. The gap between tiers is real, and it affects both the driving experience and the install complexity.
| Control tier | Fill speed | Precision | Install complexity | Best for |
|---|---|---|---|---|
| Manual (paddle valves) | Slow | Low | Simple | Budget builds, occasional towing |
| Solenoid manifold | Moderate | Medium | Moderate | Regular towing, daily drivers |
| Digital / ECU | Fast | High | Complex | Show builds, mixed daily/tow use |
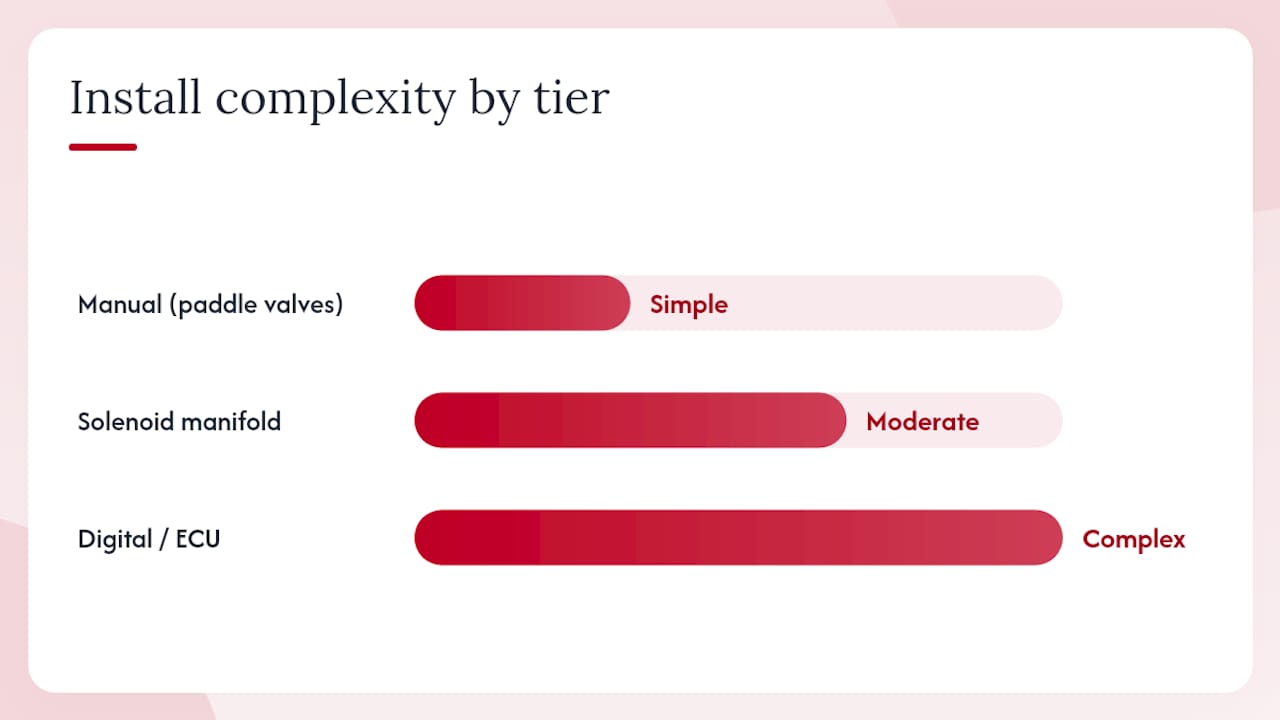
Manual systems use physical paddle valves to open and close air to each bag. They’re reliable and cheap, but you’re adjusting pressure by feel, and there are no presets. Solenoid manifolds add electrically controlled valves, so you can wire in a switch panel and get faster, more repeatable fills. Digital systems, as AirRide’s controller guide describes, go further with app integration, automatic leveling, and saved height presets, and some units tie into the vehicle’s own electronics.
The trade-off is cost and wiring complexity. A digital ECU system can add several hundred dollars to the kit price and requires more installation time, especially if you’re adding ride-height sensors.
Pro Tip: Ride-height sensors matter most when your load changes frequently, like a truck that hauls different payloads week to week. Wikipedia’s air suspension entry notes that height-sensing systems maintain a set position regardless of load, while pressure-only systems maintain a set PSI, which means the ride height shifts as weight changes. For show-only builds with a consistent, known load, pressure control is usually enough.
2-way vs 4-way: which configuration do you need?
Configuration choice comes down to how much independent control you want over each corner of the vehicle.
- 2-way (axle-coupled): Both bags on an axle inflate and deflate together. Simpler wiring, fewer solenoids, lower cost. Works well for towing and load-leveling where you want both rear bags at the same pressure. The limitation is body roll: if one side of the vehicle is heavier, a 2-way system can’t compensate corner by corner.
- 4-way (corner-by-corner): Each bag is independently controlled. Most modern vehicle-specific kits now ship with 4-way capability because it allows precise leveling on uneven loads and is standard for show builds that need exact stance control. More solenoids, more wiring, more cost, but significantly more capability.
On tank and compressor count, the decision is simpler than it sounds:
- Single tank, single compressor: Fine for daily drivers and occasional towing. Slower fill times, but adequate for most use cases.
- Dual tank or larger tank: Recommended for show builds where you’re repeatedly airing up and down. More reserve air means faster fills and less compressor cycling.
- Dual compressors: Add redundancy and speed. If one compressor fails, the other keeps the system running. Worth the investment on a truck you depend on for towing.
For towing, a 2-way rear setup with a reliable single compressor and a pressure-based manifold covers most needs. For show use, go 4-way with dual tanks and, if budget allows, dual compressors.
How to pick the right air ride kit for your vehicle
Work through this checklist in order before you commit to a purchase.
- Confirm vehicle compatibility. Enter your year, make, model, and trim into the vendor’s fitment selector. Check that the kit specifies bracket type, shock compatibility, and wheel/tire clearance for your exact configuration.
- Rank your use case priorities. Towing first? Ride quality first? Show stance? Your top priority determines which tier and configuration to buy. Don’t pay for digital ECU management if you only tow a boat twice a year.
- Verify component specs. Check compressor CFM and duty cycle, tank volume and working PSI, max bag PSI, and whether airlines are DOT-rated. These numbers should be on the product page, not buried in a PDF you have to request.
- Match the control type to your need. Manual for budget/occasional use, solenoid for regular use, digital for show or mixed daily/tow duty.
- Compare warranty and support. Look for separate coverage on parts vs labor, and note the warranty length. A kit with a 1-year bag warranty and no compressor coverage is a different value proposition than one with 3-year comprehensive coverage.
Questions to ask before you buy:
- Does the kit include vehicle-specific brackets, or will I need to fabricate mounts?
- What’s the return policy if a component arrives damaged or doesn’t fit?
- Is installation documentation included, or do I need to download it separately?
- What are the torque specs for the mounting hardware?
- Does the kit require ride-height sensors for the controller to function, or is pressure-only mode available?
Red flags to watch for:
- No fitment selector or a selector that only asks for year/make without model or trim
- Warranty language that excludes compressor or solenoid failures
- No installation guide linked on the product page
- Specs listed as “varies” or left blank for CFM, tank size, or max PSI
- Any claim that the kit increases your GVWR or legal towing capacity (it doesn’t, and a vendor making that claim is a vendor to avoid)
Pro Tip: A truck owner prioritizing towing should start with a load-leveling, vehicle-specific kit with at least a pressure-based manifold. Something like the LoadLifter 7500 XL is built for heavy-duty applications and ships with fitment-specific hardware, which cuts install time significantly.
What does air ride suspension cost, and how long does installation take?
Auto Express notes that air suspension delivers major ride-quality benefits but repairs and electronics work can run more expensive than conventional spring systems. Budget accordingly from the start.
DIY vs professional installation:
- DIY install on a basic rear helper-spring kit typically takes 2–4 hours with basic hand tools and a floor jack. A full four-corner digital system can take 8–16 hours or more, depending on vehicle complexity and wiring routing.
- Professional shop labor typically runs $75–$150 per hour. A mid-tier rear kit install might cost $200–$400 in labor; a full four-corner digital system can run $600–$1,500 or more at a shop.
- Shipping lead times for in-stock kits generally run 3–7 business days. Backordered brackets, custom-length airlines, or fabricated components can push that to 2–4 weeks.
Total cost of ownership items to budget for:
- Replacement air springs periodically depending on use and maintenance
- Compressor rebuild or replacement after several years on high-use rigs
- Airline and fitting replacements as UV and heat exposure degrades the lines over time
- Solenoid manifold service if valves start sticking or leaking
Maintenance, common failures, and what your warranty should cover
The most common failure modes in air suspension systems are predictable, and most are preventable with basic maintenance.
Common failure modes:
- Airbag drying or rupture from UV exposure, ozone, or running bags fully deflated for extended periods
- Airline and fitting leaks, usually at connection points that weren’t fully seated during installation
- Compressor wear from overuse or running without adequate cool-down time (exceeding duty cycle)
- Tank rust or corrosion, especially in regions with road salt exposure
- Solenoid manifold faults from moisture ingress or voltage spikes
- Sensor failures on digital systems, usually from vibration or connector corrosion
Maintenance schedule:
- First month after install: Check all fittings and connections weekly. New installations often develop minor leaks as components settle.
- Monthly (high-use towing rigs): Check bag pressure and compressor duty cycle. MotorTrend’s towing guide recommends keeping minimum pressure in air springs even when not towing to preserve bag shape. Leaving bags fully deflated causes creasing and premature failure.
- Seasonal: Inspect airlines for cracking or UV damage, drain the tank of moisture, and check solenoid connectors for corrosion.
- Annually: Test compressor output against its rated CFM. A compressor that takes noticeably longer to fill the system than it did at install is showing wear.
Troubleshooting basics:
- Spray soapy water on all fittings and connections while the system is pressurized. Bubbles locate leaks immediately.
- Disconnect the compressor and monitor system pressure over 30 minutes. Pressure drop confirms a leak somewhere in the bag, line, or manifold.
- Listen to compressor run time. If it cycles more frequently than usual, the system is losing pressure faster than it should.
- For digital systems, check sensor connectors before replacing sensors. Loose or corroded connectors cause most sensor fault codes.
What to look for in a warranty:
- Separate coverage terms for bags, compressor, solenoids, and controller (a blanket “limited warranty” that doesn’t specify components is a red flag)
- Labor coverage or reimbursement if a defective component requires reinstallation
- Warranty length of at least 1 year on compressors and 2 years on bags for a mid-tier kit
Pro Tip: Never store a vehicle with its air bags fully deflated for more than a day or two. Even 5–10 PSI in the bags keeps them from creasing at the folds. Check the manufacturer’s minimum PSI spec and treat it as a hard floor, not a suggestion.
Why buy from Ozkonic Kustomz?
Ozkonic Kustomz sources every air suspension kit directly from vetted manufacturers, runs fitment verification on each SKU, and backs purchases with fast US shipping and a clear return policy. If a kit doesn’t fit your vehicle as listed, the support team resolves it, not a third-party call center.
Key reasons to buy from Ozkonic Kustomz:
- Direct manufacturer sourcing: Every kit in the catalog comes from a vetted supplier, which eliminates the counterfeit and spec-mismatch risk that’s common on generic marketplaces.
- Fitment-checked SKUs: The store’s fitment selector confirms compatibility by year, make, model, and trim before you add to cart. Product pages like the 99 Chevy 4x4 rear kit show exactly how a fitment-specific listing should look.
- Installation documentation: Kits ship with or link to installation instructions, so you’re not searching forums for torque specs the night before your install.
- Responsive support: Pre-sale fitment questions, cross-reference checks, and post-sale issues are handled by people who know the product, not a generic returns department.
- Fast shipping and clear returns: In-stock orders ship quickly, and the return policy is straightforward, which matters when you’re coordinating an install appointment.
Does your vehicle’s suspension actually fit the kit you’re considering?
Fitment is where most air suspension purchases go wrong, and it’s the one variable no amount of research replaces. A kit that fits a 2019 F-150 SuperCrew with a 5.5-foot bed may not fit the same truck with a 6.5-foot bed, or with an aftermarket leveling kit already installed.
The fitment selector is your first stop, not your last. After confirming the base vehicle match, check these secondary variables:
- Existing lift or leveling kit: Any spacer or leveling kit changes the geometry the air kit was designed around. Confirm with the vendor whether the kit is compatible with your current lift height.
- Wheel and tire size: Larger wheels and tires reduce clearance in the wheel well. At full compression, the bag and shock assembly needs room to move without contacting the tire.
- Shock compatibility: If your truck has aftermarket shocks already installed, verify whether the air kit includes matched shocks or is designed to work with your existing units.
- Cab and bed configuration: Wheelbase affects rear suspension geometry. Always specify cab style and bed length, not just year and model.
For vehicle-specific examples of how fitment documentation should look, the LoadLifter 5000 Ultimate for 2004–2014 Ford F-150 4WD page shows the level of fitment detail a quality listing provides. If a product page doesn’t give you that level of specificity, ask before you order.
A note from the Ozkonic Kustomz shop
The fitment questions we get most often aren’t about the bags themselves. They’re about what’s already on the truck: a leveling kit that shifts the geometry, an aftermarket shock that may or may not work with the new bag, or a wheel-and-tire combo that leaves less clearance than the stock setup assumed. Those details don’t show up in a basic year/make/model search, and they’re exactly the kind of thing that turns a straightforward install into a half-day problem. If you’re not sure whether your current setup is compatible with the kit you’re considering, reach out before you order. The Ozkonic Kustomz support team can run a fitment cross-reference and flag any clearance or compatibility issues before the parts ship.
Get your air ride kit from Ozkonic Kustomz
Fitment-checked air suspension kits, shipped fast, with real support behind them. That’s the difference between buying from Ozkonic Kustomz and taking a chance on a generic listing.
Every kit in the Ozkonic Kustomz catalog is sourced directly from vetted manufacturers and verified for fitment before it goes live. You get installation documentation with the order, a clear return policy if something doesn’t work out, and a support team that can answer pre-sale fitment questions in plain language. For towing builds, the ride control air spring kit is a strong starting point. For hardware and plumbing components you’ll need during installation, the swivel elbow fitting is stocked and ready to ship. Run your vehicle through the fitment selector, pick your kit tier, and add to cart. If you have questions about compatibility or want a cross-reference check before you commit, contact the Ozkonic Kustomz team directly through the site.
Sources
- Air Ride Suspension Guide | Explaining How It Works | Fast Car
- You need load-leveling air springs on your SUV or pickup tow rig | DrivingLine
- How Air Suspension Systems Work | HowStuffWorks
- Air suspension — Wikipedia
- Air suspension basics for towing | MotorTrend
- Air Bags vs Bump Stops vs Add-a-Leaf: What’s Best for Towing Your Trailer? | Pacbrake
- What is a controller? – AirRide Air Suspension
- What is air suspension? How it works and pros and cons | Auto Express