An LS swap is one of the most practical engine conversions you can do, but only if you plan fitment and system compatibility before you buy a single part. The engine itself is rarely the problem. As swap guides consistently note, most delays and blown budgets come from mismatched supporting systems: cooling, fuel, wiring, and accessory drive. Get those right up front and the project moves fast. Skip them and you’ll spend twice as long fixing clearance problems you could have caught in an afternoon of measuring.
The single highest-priority decision is this: pick your LS variant, confirm it physically fits your chassis (oil pan, mounts, accessory drive, header clearance), and match it to a compatible transmission and ECU before ordering anything else. Everything else flows from that.
Before you buy the engine, work through these four steps:
- Measure engine bay depth, firewall clearance, and frame rail width
- Identify swap kits built specifically for your chassis
- List your wiring and ECU options (factory PCM vs. standalone)
- Build a ballpark budget with a 20–30% contingency baked in
Pro Tip: Treat the engine and transmission as a single subassembly from day one. Buying an engine without confirming mount and oil pan fitment first is the fastest way to double your build time and cost.
Table of Contents
- What parts do you need before starting an LS swap?
- How do you pick the right LS variant for your build?
- What fitment issues will you actually run into?
- What are your wiring and ECU options for an LS swap?
- How do you size the fuel and cooling systems correctly?
- Which transmission, exhaust, and driveline choices do you need to make?
- What tools, workspace, and budget do you actually need?
- What is the correct step-by-step sequence for an LS swap?
- How do you troubleshoot a no-start or common failure after an LS swap?
- The system mindset: your one-page fitment checklist before you buy
- How do you integrate the transmission ECU and tune the computer?
- Key Takeaways
- What Ozkonic Kustomz has learned from supporting LS swap builders
- Get the right LS swap parts from Ozkonickustomz
- Useful sources and references
What parts do you need before starting an LS swap?
A stalled build is almost always a sourcing problem. Here is the complete shopping list, organized so nothing gets missed.
Core assembly:
- LS engine (long block or complete with accessories).
- Transmission (4L60E, 4L80E, T56, or equivalent)
- Bellhousing (confirm LS bolt pattern compatibility)
- Starter (LS-specific offset; truck and car starters differ)
Chassis integration:
- Engine mount kit (chassis-specific)
- Transmission crossmember or mount
- Swap-specific oil pan and pickup tube
- Driveshaft (likely needs trimming or replacement)
Induction and exhaust:
- Headers or exhaust manifolds (chassis-specific fitment)
- Air intake with adequate MAF straight-run (minimum 10 inches before the sensor)
- Throttle body (most post-2000 LS engines use drive-by-wire)
Electrical and fuel:
- Wiring harness (swap-specific or modified donor harness)
- ECU/PCM (matched to engine and reluctor wheel type)
- High-pressure EFI fuel pump (255 LPH minimum).
- Fuel rails, lines, regulator, and filter
- Gauge interface adapters for modern sensor signals
Cooling:
- High-flow aluminum radiator
- Electric fan(s) with shroud
- Coolant hoses and reservoir
- Steam tube routing from cylinder head ports
Three items builders consistently overlook: oil pickup tube length (it must match the pan’s sump depth exactly), starter position (truck and F-body starters use different offsets and will foul headers or the crossmember), and MAF placement (too close to a bend kills fuel trim accuracy).
Swap kit vendors now supply nearly complete conversion packages for most popular chassis, bundling mounts, oil pans, pickup tubes, and crossmembers. That approach eliminates most trial-and-error fitment work and reduces the need for custom welding.
| Part Category | Why Fitment Matters | Typical Price Range | Fitment Risk |
|---|---|---|---|
| Engine mount kit | Sets engine position; affects all downstream clearances | $150–$400 | High |
| Swap oil pan + pickup | Ground clearance, steering/suspension interference | $200–$500 | High |
| Headers | Flange position varies by LS variant; frame/steering clash | $300–$800 | High |
| Wiring harness | Connector routing, PCM location, sensor compatibility | $400–$1,000 | Medium |
| Fuel pump/module | Pressure target, return vs. returnless configuration | $100–$350 | Medium |
| Radiator + fans | Core size, inlet/outlet position, shroud clearance | $250–$700 | Medium |
| Driveshaft | Output shaft length changes with transmission swap | $150–$500 | Low–Medium |
Pro Tip: Source your chassis-specific pieces (mount kit, oil pan, header set) before you commit to a core engine. Discovering the only compatible pan won’t clear your steering rack after the engine is sitting on the floor is an expensive lesson.
How do you pick the right LS variant for your build?
The short answer: if you’re on a budget or doing your first swap, start with a 5.3L truck Vortec. If you want serious power without a full rebuild, the LS3 is the cleanest path. Here’s how the common variants stack up.
5.3L Vortec (LM7/L59/LR4) is the budget king. Junkyard cores regularly sell for $500–$1,500 depending on mileage and region. Iron block, 270–320 hp stock, and donor trucks are everywhere. The trade-off is weight and a 24x reluctor wheel on pre-2007 engines, which affects PCM and transmission controller compatibility. Ideal for budget daily drivers, truck-based swaps, and first-time builders.
LQ4/LQ9 (6.0L) shares the iron block but adds displacement and torque. The LQ9 came with higher-compression heads from the factory, making it a strong base for a mild build. Expect 300–360 hp stock, with real headroom for cam and head upgrades. Good for heavy vehicles or builds where low-end torque matters more than peak power.
LS1 is the original aluminum-block swap engine, pulled from 1997–2004 Camaros, Firebirds, and Corvettes. At 345 hp stock and roughly 100 lbs lighter than an iron 5.3L, it’s a natural fit for classic muscle cars and sports car builds. Donor harnesses are plentiful, and the 24x reluctor wheel is well-supported. Cost runs higher than a truck 5.3L because demand is strong.
LS6 is the high-compression version of the LS1, factory-rated at 405 hp in the 2001–2004 Z06 Corvette. The heads flow significantly better than standard LS1 castings. If you find one at a reasonable price, it’s a genuine performance engine without any modifications.
LS2 (6.0L aluminum, 2005–2007 Corvette/GTO/SSR) and LS3 (6.2L aluminum, 2008+ Corvette/Camaro) are the modern performance choices. The LS3 makes 430–436 hp stock and uses a 58x reluctor wheel, which pairs cleanly with later 6-speed automatics and modern standalone ECUs. It costs more than a truck engine but delivers a platform that doesn’t need a cam swap to feel fast.
Buying guidance:
- Junkyard core: Lowest cost, highest risk. Verify compression, check for smoke, confirm reluctor wheel type, and get the PCM and harness with the engine if possible.
- Reman/low-mileage used: Middle ground. Look for documented mileage, no oil consumption, and matching accessories.
- Crate long block: Highest cost, cleanest build. GM Performance and other suppliers offer warranty-backed assemblies. Best for full builds where you’re also upgrading the drivetrain.
Before you pull the trigger on a donor engine, confirm:
- Reluctor wheel type (24x for pre-2006 truck engines; 58x for LS2, LS3, and later)
- Head casting numbers (to know what compression and flow you’re starting with)
- Whether the PCM and harness are included
- Signs of oil consumption or coolant contamination
- Accessory drive configuration (truck vs. car drives are different)
For more on engine internals and build goals, the difference between a stock rebuild and a performance-oriented long block matters a lot once you start adding boost or a cam.
What fitment issues will you actually run into?
Physical fitment is where most LS swaps get expensive fast. The LS block typically needs to sit about an inch farther forward than an older small-block to clear the firewall and accessory drive. That single inch has downstream consequences for intake clearance, radiator hose routing, and header collector position.
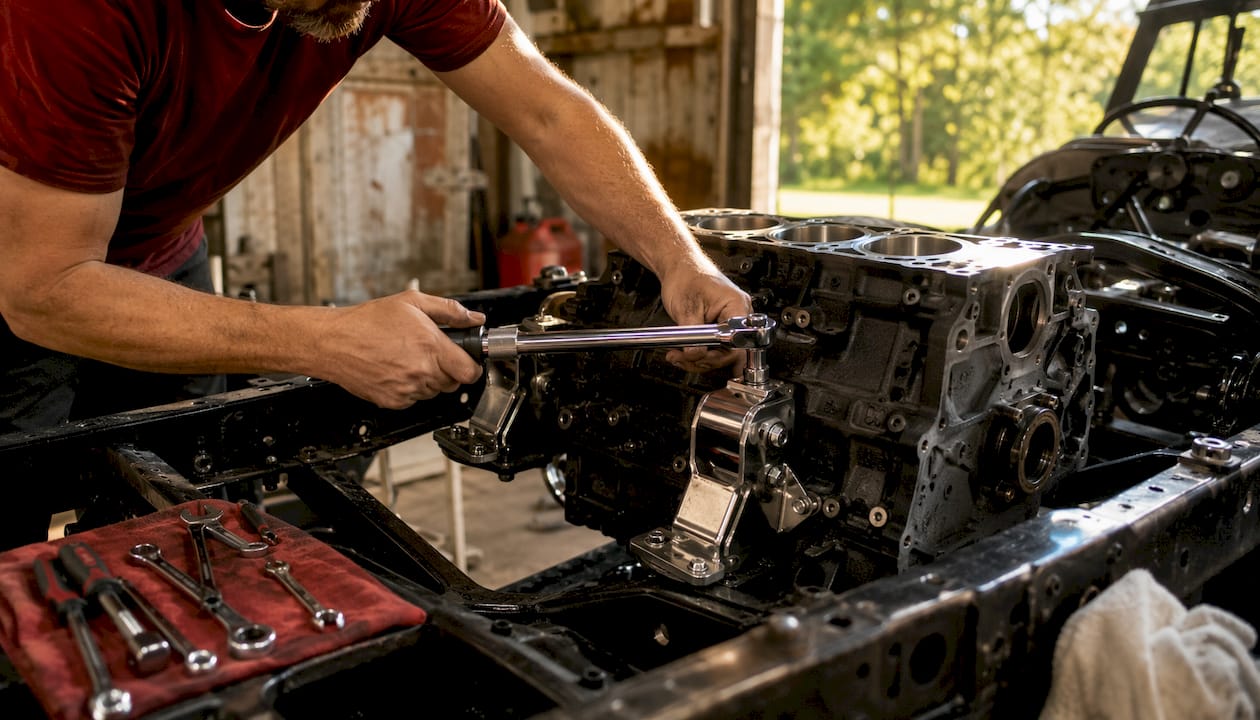
Mounts and crossmember
Swap-specific mount kits set the engine’s fore-aft and lateral position. Mixing mounts from different manufacturers is a common mistake. Restomod Academy’s guidance is direct: mixing and matching conversion parts from different vendors frequently creates clearance and driveline alignment problems that are genuinely hard to diagnose after the fact. Buy the mount kit, crossmember, and transmission mount from the same supplier. Measure your frame rail width and compare it to the kit’s specified dimensions before ordering.
Oil pan and pickup tube
LS engines come with several different pan configurations: truck pans (deep rear sump), F-body pans (front sump), and Corvette pans (dry-sump or specific wet-sump). The pan you need depends entirely on your chassis. A truck pan that clears the frame on a GMT400 pickup will foul the steering rack on a first-gen Camaro. The pickup tube must match the pan’s sump depth exactly. A tube that’s too short starves the pump at high RPM; one that’s too long contacts the pan floor and causes the same problem.
Accessory drive and starter offset
The LS accessory drive is wider than most older V8 setups. Alternator and A/C compressor positions frequently conflict with frame rails or inner fenders in tight engine bays. Swap-specific accessory drive kits (compact or truck-style) solve this, but you need to decide which one before mocking up the engine. Starter position is equally critical: LS car starters and truck starters use different offset angles, and the wrong one will contact the headers or crossmember.
Header clearance
Long-tube headers deliver the best power gains but require the most clearance work. Collector position varies between LS variants, and the same header set that clears a 350 small-block may hit the steering shaft or frame on an LS. Confirm collector location against your steering components and frame before purchasing.
Fitment rule of thumb: Mock up the engine with the oil pan, accessory drive, and headers installed before you weld or drill anything. Discovering a header-to-steering-shaft conflict with the engine hanging on a hoist costs you an afternoon. Discovering it after the mounts are welded costs you a week and a grinder.
Pro Tip: Photograph every clearance point during mock-up: pan-to-crossmember gap, header-to-steering-shaft distance, and accessory drive-to-inner-fender clearance. Those photos will save you hours if you need to revisit fitment after wiring or cooling work shifts something.
What are your wiring and ECU options for an LS swap?
Wiring is the step that intimidates most first-time builders, but the options are cleaner than they used to be. The core decision is whether to use the donor factory PCM with a converted harness or install a standalone aftermarket ECU.
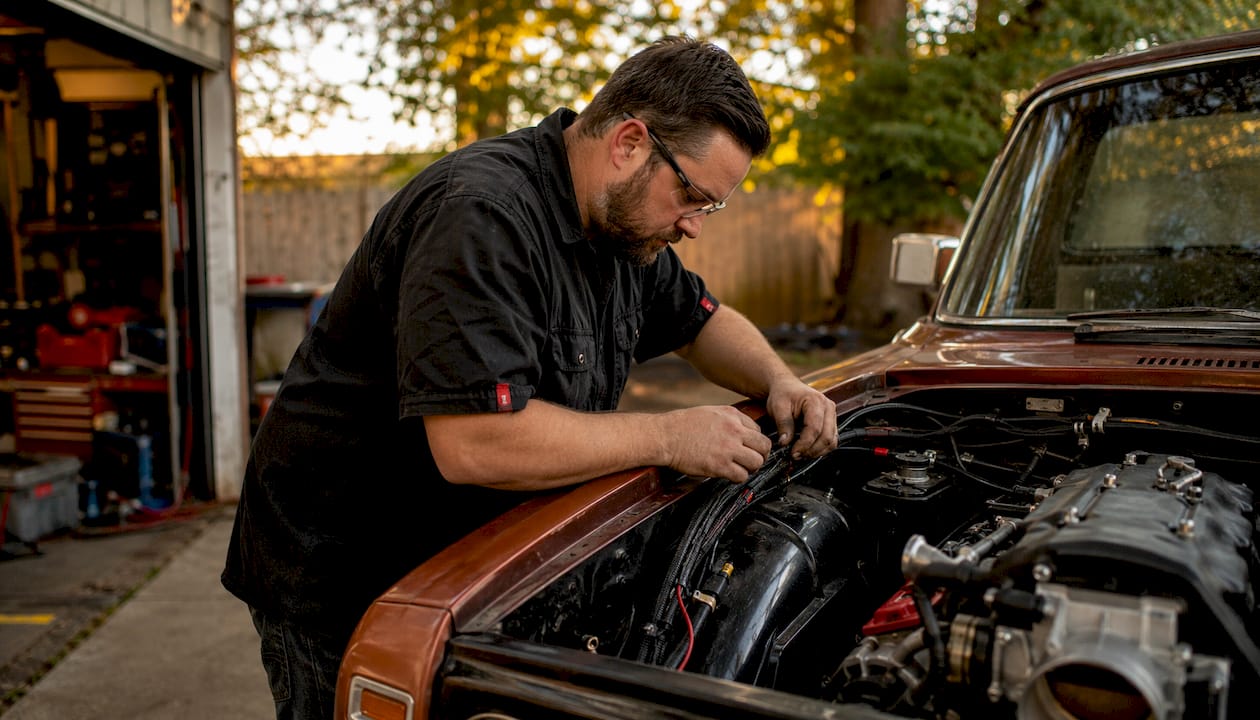
Factory PCM with a converted harness is the most cost-effective path for a stock or mildly modified engine. You keep the OEM calibration, OBD-II diagnostic compatibility, and transmission control integration. The downside is complexity: you need to strip the donor harness of chassis-specific wiring (ABS, airbag, body control modules) and either modify it yourself or buy a pre-modified swap harness.
Standalone ECU (Holley EFI Terminator X, HP EFI, and similar systems) gives you full tuning control, clean wiring, and the ability to add boost or nitrous safely. Holley’s systems are well-documented and widely used in the swap community. The trade-off is cost and setup time: you’ll need a laptop, tuning software, and either a base map or a professional tune.
Harness options:
- Modified donor harness: Lowest cost, highest time investment. Requires careful labeling during donor removal.
- Swap-specific harness (Painless Wiring, American Autowire): Pre-modified for swap use, with labeled connectors and a clean fuse block. Ozkonickustomz stocks the Painless Wiring 60140 harness for 1997–2004 LS1 engines and the 03–06 GM 4.8/5.3/6.0L EFI harness for truck-era engines.
- Standalone ECU package: Includes ECU, harness, and sensors. New standalone harnesses start around $750 and climb from there depending on features and ECU type.
Reluctor wheel compatibility matters here. Pre-2006 truck engines use a 24x reluctor wheel; the LS2, LS3, and later engines use 58x. Your PCM or standalone ECU must match the reluctor wheel on the engine. Mixing them causes a no-start or severe timing errors. If you’re pairing a 4L60E or 4L80E automatic, the transmission controller also needs to communicate with the PCM, which affects which harness and ECU combination you can use.
Practical checklist for wiring:
- Confirm reluctor wheel type (24x vs. 58x) before selecting PCM or standalone ECU
- Source a VATS/immobilizer bypass if using a donor PCM
- Identify throttle control type (drive-by-wire requires a matching pedal assembly)
- Plan gauge interface adapters for oil pressure, coolant temp, and fuel level signals
- Confirm O2 sensor bung placement in your exhaust for closed-loop fuel control
For classic car builds where you’re also replacing the chassis wiring, an American Autowire system handles the dash and body circuits separately from the engine harness, keeping the two systems clean and independent.
Pro Tip: If you’re planning to add boost, nitrous, or a significant power upgrade later, buy the standalone ECU now. Retrofitting a standalone system after the engine is running on a factory PCM means pulling and redoing the entire harness.
How do you size the fuel and cooling systems correctly?
Design both systems for your intended horsepower with a safety margin. An undersized fuel pump or a marginal radiator will cost you an engine or a tow home.
Fuel system basics: LS EFI systems target approximately 58 psi for proper injector operation in both return-style and returnless configurations. Your stock fuel system almost certainly can’t deliver that pressure. The most reliable solution for most builds is an EFI-ready in-tank module that replaces the factory pump and sender as a unit. A Walbro 255 LPH pump supports most builds up to 500 hp. For higher power, step up to a 340+ LPH unit. Use -6 AN lines for most applications up to 600 hp, a 10-micron EFI-rated filter before the engine, and a fuel pressure regulator set to 58 psi on return-style systems.
For more detail on fuel system upgrade options, the choice between return and returnless configurations also affects how you route lines and where you mount the regulator.
Cooling system basics: A V8 in a chassis that originally held a six-cylinder or small four-cylinder generates significantly more heat. Plan for a high-flow aluminum radiator with a core at least 2 inches thick, dual electric fans with a proper shroud, and correct inlet/outlet positioning to match your LS water pump’s flow direction. The steam tube from the rear of the cylinder heads must be plumbed into the upper radiator hose or coolant reservoir or you’ll trap air and get chronic overheating.
| Component | Budget Option | Mid-Range Option | High-End Option |
|---|---|---|---|
| Fuel pump | Walbro 255 LPH in-tank module (~$80–$120) | 340 LPH in-tank module (~$150–$200) | Dual pump setup or external surge tank ($300+) |
| Fuel lines | Steel hard lines with EFI fittings | -6 AN braided lines | Full AN plumbing with swivel fittings |
| Radiator | 2-row aluminum, generic fit (~$150–$250) | 3-row aluminum, application-specific (~$300–$500) | Custom-core aluminum with dual-pass design ($600+) |
| Cooling fans | Single electric fan, no shroud (~$60–$100) | Dual fans with universal shroud (~$150–$250) | Dual fans with custom-fit shroud and controller ($400+) |
Common pitfalls: Insufficient return line length causes fuel pressure spikes under hard acceleration. Poor venting in custom tanks creates vapor lock. An undersized radiator core or a fan setup without a shroud will overheat at low vehicle speeds even if it runs fine on the highway.
Pro Tip: Measure the available space between the radiator core support and the engine before finalizing your accessory drive and fan setup. A fan that physically fits the radiator but won’t clear the water pump pulley is a common late-stage surprise.
Which transmission, exhaust, and driveline choices do you need to make?
Transmission choice shapes the entire rear half of the build: bellhousing clearance, driveshaft length, crossmember position, and whether you need a standalone transmission controller.
4L60E/4L65E is the most common choice for mild to moderate builds. It’s compact, affordable, and widely available from donor trucks and cars. Rated for engines under 400 hp in stock form, it pairs directly with the factory PCM on most LS setups. The weakness is durability at high power levels; a built 4L60E can handle more, but that adds cost.
4L80E is the heavy-duty automatic option, pulled from 3/4-ton and 1-ton GM trucks. It handles significantly more torque, but it’s longer and heavier than the 4L60E, which affects driveshaft length and may require a different crossmember. It also needs its own controller if you’re not using a PCM that natively supports it. Transmission rebuilds and replacements are often several thousand dollars, with high-performance units costing substantially more—plan for that when budgeting.
T56 6-speed manual is the performance choice. It handles 700+ hp in Magnum form, offers six speeds with overdrive, and gives the driving experience most enthusiasts actually want. The trade-off is cost (used T56 transmissions are not cheap) and the need for a clutch and flywheel matched to the engine’s crankshaft flange. If you need professional help with clutch or transmission installation, having a shop handle the final alignment and break-in is worth considering.
Exhaust and headers: Long-tube headers make the most power but require the most clearance work. Shorty headers are easier to fit but restrict flow. Confirm collector position against your steering shaft and frame rails before buying. Catalytic converter placement matters for emissions compliance. Check your state’s inspection requirements before committing to a catless setup.
Driveline checklist:
- Confirm transmission output shaft length and yoke type
- Measure driveshaft length with transmission in final position
- Verify rear differential strength if horsepower increases significantly (stock 7.5-inch and 8.8-inch rearends have limits)
- Confirm U-joint angles are within acceptable range (typically under 3 degrees)
Pro Tip: Choose your torque converter or clutch before finalizing the transmission. A converter with the wrong stall speed makes an automatic feel sluggish off the line and can push the transmission into a different heat range under repeated use.
What tools, workspace, and budget do you actually need?
Essential tools:
- Engine hoist (2-ton minimum) and engine leveler
- Jackstands (at least four; never work under a car on a floor jack alone)
- Full socket set including 10mm through 36mm, plus 3/8" and 1/2" drive
- Torque wrench (25–250 ft-lb range)
- AN wrench set for fuel line fittings
- Wiring tools: crimper, heat-shrink kit, multimeter, test light
- Hose cutters and clamp pliers
- Angle grinder and welder (or access to one for mount tacking)
Timeline by experience level:
- Beginner (first swap): 150–200 hours spread over several months. Budget extra time for mock-up, wiring troubleshooting, and first-start diagnostics.
- Intermediate (one or two prior swaps): 80–120 hours. Most of the extra time goes to chassis-specific fitment and tuning.
- Advanced (experienced fabricator): 40–80 hours on a well-supported chassis with a complete kit.
Budget bands:
- Low-budget build: Junkyard 5.3L ($500–$1,500), DIY-modified donor harness, basic swap kit, used transmission. Total parts estimate: $3,000–$5,000 before labor.
- Mid-range build: Low-mileage used LS3 or reman 5.3L, new swap harness ($750+), standalone ECU, new radiator and fans. Total parts estimate: $8,000–$12,000.
- Full build: Crate long block, Holley EFI system, professional tuning, custom driveshaft, rebuilt or upgraded transmission. Total estimate: $15,000–$25,000+.
| Tool | Why You Need It | Rent or Own? |
|---|---|---|
| Engine hoist | Lifting and positioning the engine safely | Rent |
| Engine leveler | Tilting engine for transmission alignment | Rent |
| Torque wrench | Accurate fastener torque on heads, mounts, and drivetrain | Own |
| Multimeter | Wiring continuity and voltage checks | Own |
| AN wrench set | Fuel line fittings without rounding | Own |
| Angle grinder | Clearance grinding, mount prep | Own |
| MIG welder | Tacking mounts, exhaust work | Rent or own |
Pro Tip: Reserve 20–30% of your parts budget as a contingency. Unexpected fitment issues, a cracked header, or a sensor that doesn’t match your PCM will happen. Having that buffer means you keep moving instead of stopping the build.
What is the correct step-by-step sequence for an LS swap?
Follow this sequence and you avoid the most common rework loops. Skipping mock-up or wiring documentation is where most builds stall.
- Select and acquire donor engine. Confirm reluctor wheel type, compression, and included accessories. Get the PCM and harness with the engine.
- Document and label the donor harness and PCM. Photograph every connector. Label every wire before cutting anything.
- Remove the original engine and transmission. Drain fluids, label all hoses and brackets, and photograph the engine bay before teardown.
- Prepare mounts and crossmember. Install the swap mount kit per manufacturer instructions. Confirm frame rail measurements match kit specs.
- Mock up the engine with oil pan and accessory drive installed. Set the engine on the mounts without bolting anything permanently. Check firewall clearance, header position, and accessory drive-to-inner-fender gap.
- Verify all clearances. Headers vs. steering shaft, oil pan vs. crossmember, intake vs. firewall, fan vs. water pump pulley. Resolve conflicts before proceeding.
- Install fuel and cooling systems. Run fuel lines, install pump and regulator, mount radiator and fans, route coolant hoses and steam tube.
- Install wiring harness and ECU. Route harness, connect sensors, install fuse block, and complete PCM or standalone ECU integration. Verify reluctor wheel match and throttle control wiring.
- Complete drivetrain hookup. Install transmission, crossmember, and driveshaft. Confirm U-joint angles and driveshaft length.
- Pre-start checks. Verify fuel pressure at the rail, check for fuel smell, confirm oil is filled and pressure primed, check for vacuum leaks, verify all sensor connections.
- First start and break-in. Start the engine, monitor oil pressure and coolant temperature immediately. Run a proper cam break-in cycle if applicable (flat-tappet cams require 20 minutes at 2,000–2,500 RPM with no idling).
- Tune and road test. Perform a base tune or professional dyno tune, verify fuel trims, and check for codes.
Pro Tip: Photograph wiring connectors and label every wire during donor engine removal. That documentation cuts ECU integration time in half and makes troubleshooting a no-start a 20-minute job instead of a two-day one.
How do you troubleshoot a no-start or common failure after an LS swap?
Most post-swap problems fall into five categories. Knowing which one you’re dealing with saves hours of guessing.
Top five failure modes:
- No-start from crank/cam sensor mismatch: Usually a reluctor wheel mismatch (24x PCM on a 58x engine or vice versa). The engine cranks but won’t fire.
- Immobilizer/VATS lockout: Donor PCM still has the theft system active. The PCM sees no valid key signal and cuts injector pulse.
- Low oil pressure from incorrect pickup tube: Pickup tube too short or wrong pan style. Oil pressure reads normal at idle but drops under load.
- Overheating from undersized radiator or trapped air: Steam tube not plumbed, wrong fan direction, or radiator core too small for the heat load.
- Poor idle from MAF placement: MAF sensor too close to a bend or throttle body. Turbulent airflow causes erratic fuel trim and rough idle.
No-start diagnostic flow:
- Check fuel pressure at the rail (target: ~58 psi)
- Verify crank signal with a scan tool or oscilloscope
- Check cam sync signal
- Confirm PCM communication and immobilizer/VATS status
- Verify injector pulse with a noid light
- Check for spark at the coils
Oil pressure and mechanical checks:
- Pre-oil the engine by cranking with the coil fuse pulled before first start
- Cold oil pressure should read 40–60 psi at idle; low pressure at idle points to pickup or pump issues
- Confirm pickup tube O-ring is seated and pan gasket is not blocking the pickup inlet
Emissions and legal note: Before finalizing your swap for street use, verify your state’s vehicle inspection and emissions requirements. Some states require catalytic converters and OBD-II compliance; others have exemptions for vehicles over a certain age. Check with your state’s DMV or emissions authority directly.
When to call a shop:
- ECU flashing or base map creation if you lack tuning software experience
- Driveline alignment if U-joint angles are outside spec
- Fuel pump wiring if you’re not confident with high-current circuits
- Any structural welding on mounts or crossmembers if you don’t have welding experience
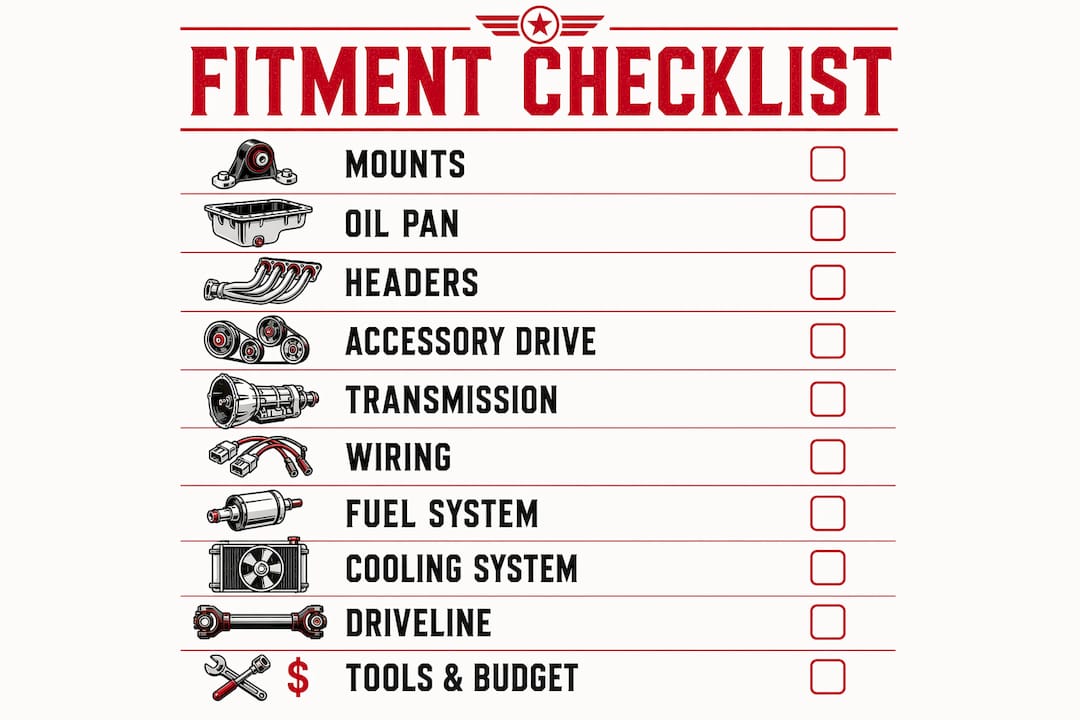
The system mindset: your one-page fitment checklist before you buy
The most expensive LS swaps are the ones where the builder bought the engine first and figured out the rest later. Every experienced builder says the same thing: there is no universal solution. Every chassis needs its own upfront research into oil pan clearance, header fitment, and accessory drive geometry.
The system mindset means treating engine, transmission, cooling, fuel, and wiring as a single engineered package. All five must be confirmed before you spend money on the core engine.
One-page fitment checklist (go/no-go by system):
- Engine and transmission: Confirm LS variant, reluctor wheel type, and transmission compatibility. Go if all three match your PCM or standalone ECU choice.
- Mounts and geometry: Confirm swap mount kit is chassis-specific and from a single vendor. Measure frame rail width against kit specs. Go if dimensions match within 1/8 inch.
- Oiling: Confirm oil pan style (truck/F-body/Corvette) clears your steering rack and crossmember with at least 1/2 inch of clearance. Confirm pickup tube length matches pan sump depth. Go if both clear.
- Accessory and intake clearance: Confirm accessory drive style (compact or truck) fits between engine and inner fender. Confirm intake manifold clears firewall with at least 1 inch of margin. Go if both clear.
- Exhaust routing: Confirm header collector position clears steering shaft and frame. Confirm catalytic converter placement meets local emissions requirements. Go if both confirmed.
- Wiring and PCM: Confirm harness type (donor modified, swap-specific, or standalone ECU). Confirm reluctor wheel match. Confirm VATS bypass plan. Go if all three are resolved.
- Fuel system: Confirm pump flow rate matches horsepower target. Confirm fuel pressure target (~58 psi). Confirm return vs. returnless configuration. Go if all three match.
- Cooling: Confirm radiator core size and inlet/outlet position match LS water pump flow direction. Confirm fan clearance to water pump pulley. Confirm steam tube routing. Go if all three confirmed.
- Driveline: Confirm driveshaft length with transmission in final position. Confirm U-joint angles under 3 degrees. Confirm differential strength for intended power level. Go if all three confirmed.
Borderline fitment decisions:
- If firewall clearance is under 1 inch with the engine in position, switch to a low-profile intake manifold or a front-sump oil pan to shift the engine rearward.
- If the oil pan-to-crossmember gap is under 1/2 inch, choose a shallower pan or a modified crossmember before proceeding.
- If header collectors conflict with the steering shaft, switch to shorty headers or a header set designed for your specific chassis.
Buy matched conversion kits from the same vendor wherever possible. Mixing manufacturers on mounts, pans, and headers is the single most reliable way to create alignment problems that take days to diagnose.
Pro Tip: Keep the donor PCM and harness intact until the engine is mechanically installed and clearances are confirmed. It dramatically speeds initial troubleshooting because you can rule out mechanical issues before touching the wiring.
How do you integrate the transmission ECU and tune the computer?
Transmission and ECU integration is where the swap either comes together cleanly or creates months of drivability problems. The key is matching all three: engine, transmission controller, and ECU.
Factory PCM integration
When using the donor PCM, the transmission controller is typically built in for 4L60E and 4L80E applications. The PCM manages shift points, torque converter lockup, and transmission line pressure based on throttle position and engine load. This works well for stock or mildly modified builds, but the factory calibration is conservative. If you’ve changed the cam, heads, or displacement, the factory tune will leave power on the table and may cause drivability issues.
OBD-II compatibility is straightforward with a factory PCM from a 1996 or later donor. The PCM communicates via the standard OBD-II port, which means any generic scan tool reads codes and live data. Pre-1996 donor PCMs use OBD-I protocols, which limits diagnostic tool compatibility.
Standalone ECU integration
A standalone ECU like the Holley Terminator X or HP EFI handles engine management independently. For transmission control, you have two options: use a separate transmission controller (TCM) that communicates with the standalone ECU via CAN bus, or use a combined engine and transmission controller like the Holley Dominator. The combined approach is cleaner but more expensive.
Tuning basics for standalone systems: start with a base map from the ECU manufacturer that matches your engine configuration, then refine fuel and ignition tables using wideband O2 data. Most builders use a professional tuner for the final calibration, especially on boosted or high-compression builds. Budget $400–$800 for a professional street tune; a full dyno tune runs higher.
Reluctor wheel and sensor compatibility
The 24x vs. 58x reluctor wheel difference affects more than just PCM selection. The 58x system provides finer crank position resolution, which improves ignition timing accuracy at high RPM. If you’re building a high-revving engine, the 58x system is worth the extra effort to source. Mixing a 24x PCM with a 58x reluctor wheel (or vice versa) causes a no-start with no obvious cause, which is why confirming this before wiring is non-negotiable.
Cam sensor compatibility also matters. The LS1 and early truck engines use a different cam sensor location and signal type than the LS3 and later engines. Confirm your harness and PCM support the cam sensor on your specific engine.
For a clean dash integration on a classic car build, a 25-circuit pro series harness handles the chassis and body circuits separately from the engine harness, which keeps diagnostics clean and prevents ground loops that cause erratic sensor readings.
Key Takeaways
A successful LS swap depends on treating the engine, transmission, cooling, fuel, and wiring as a single system, confirmed before you buy the core engine.
| Point | Details |
|---|---|
| Plan fitment before buying | Confirm oil pan, mounts, headers, and accessory drive clearance for your chassis before ordering the engine. |
| Match conversion parts by vendor | Mixing mounts, pans, and headers from different manufacturers creates alignment and clearance problems that are hard to diagnose. |
| Size fuel and cooling for your power level | LS EFI targets ~58 psi fuel pressure; use a 255 LPH minimum pump and ensure your cooling setup includes a properly shrouded dual-fan radiator. |
| Confirm reluctor wheel and ECU match | A 24x/58x mismatch between engine and PCM causes a no-start with no obvious cause; verify this before wiring. |
| Ozkonickustomz for swap-specific parts | Ozkonickustomz stocks swap harnesses, EFI fittings, and wiring kits sourced from vetted manufacturers with guaranteed fitment support. |
What Ozkonic Kustomz has learned from supporting LS swap builders
The pattern we see most often is a builder who bought a great engine at a great price and then spent three times the engine cost sorting out a harness that didn’t match the reluctor wheel, a pan that fouled the steering rack, and a radiator that was two inches too narrow for the fan shroud. None of those problems are hard to solve in the planning phase. All of them are expensive to solve after the engine is in the car.
Our approach at Ozkonickustomz is to source parts from vetted manufacturers with documented fitment specs, so you know what you’re getting before it ships. We stock Painless Wiring harnesses for LS1 and truck-era EFI engines, American Autowire systems for classic car chassis, and EFI fuel system fittings that match standard AN plumbing. Fast shipping and a straightforward return policy mean that if a part doesn’t fit, you’re not stuck. Our blog covers the technical side of these builds in detail, and our product pages include fitment notes so you can cross-reference before you order.
The builders who finish clean are the ones who treated the swap as a system project from the start. That’s the approach we support.
Get the right LS swap parts from Ozkonickustomz
Ozkonickustomz stocks the wiring harnesses, EFI fittings, and swap-specific components that make the difference between a clean build and a parts-sourcing nightmare. Every part ships from vetted manufacturers with guaranteed fitment specs, so you’re not guessing on compatibility.
For truck-based swaps, the Highway 22 modular wiring kit handles electrical distribution cleanly on GMT400 and similar platforms. For fuel system plumbing, the swivel EFI fitting connects 1/8-inch NPT sensor ports to -4 AN fuel lines without adapters. Need a replacement hose kit for coolant or HVAC lines disturbed during the swap? That’s in stock too.
Browse the full swap parts catalog at Ozkonickustomz, or contact the team directly for fitment questions before you order. The goal is a parts order that arrives complete, fits the first time, and keeps your build moving.
Useful sources and references
These are the primary references used throughout this guide. Bookmark them for torque specs, fitment details, and wiring diagrams.
- In The Garage Media: So You Want to Do an LS Swap — Practical overview of supporting system costs and the integrated-system approach to planning.
- Restomod Academy: The Definitive Guide to an LS Engine Swap — Detailed fitment guidance, matched-kit recommendations, and fuel system pressure targets.
- LSXMag: LS Swap 101 — Wiring harness pricing, transmission cost ranges, and what to expect from a full swap budget.
- LS1Tech: Budget LS Swap Guide — Community-sourced junkyard pricing and budget build strategies for 5.3L swaps.
- LS1Tech: LS Swap Parts List — Comprehensive parts list and swap kit sourcing for common chassis.
- Speedway Motors: LS Swap How-To Guide — Vendor resource with chassis-specific swap kit options and installation notes.
- Holley: Ultimate Guide to GM LS Engines — Authoritative reference for LS variant identification, ECU compatibility, and Holley EFI system integration.
- GM Service Manual — Primary source for torque specifications, sensor locations, and wiring diagrams. Available through GM’s service information portal or from your local dealer.
Recommended
- Engine Internals Upgrade Examples for Performance Builders – Ozkonic Kustomz LLC
- Performance Parts for Daily Drivers: 2026 Guide – Ozkonic Kustomz LLC
- What Is Engine Displacement? A Guide for Enthusiasts – Ozkonic Kustomz LLC
- Header Installation Guide: Boosting Performance on Your Small Block Ch – Ozkonic Kustomz LLC