The best approach for most C10 owners is a matched front and rear air-ride kit with air management sized to how you’ll actually use the truck, not just how low it will sit in the driveway. A bolt-in kit paired with correctly sized shocks, a properly rated compressor and tank, and a real fitment plan for your specific model year gets you show-worthy stance without turning your truck into a trailer queen.
That last part matters more than most first-time buyers realize. A C10 suspension upgrade done right treats air ride as a system, not a single part purchase. Skip a piece and you’re chasing leaks or burning out a compressor within a year.
Here’s what belongs on your shopping list before you spend a dollar:
- Corner air springs matched to your front and rear geometry, not a generic universal bag
- Shocks sized for full air travel, since undersized shocks are the number one cause of blown dampers on a slammed C10
- A tank and compressor sized to how often you plan to air up and down, not the cheapest combo you find
- A valve block or controller that fits your skill level, from a basic four-corner paddle switch to a full digital management system
- Fitment hardware like C-notch kits or 4-link brackets if your target ride height requires them
Pro Tip: Buy your kit from a source that publishes model-year fitment templates and torque specs up front. If a listing can’t tell you whether your year truck needs a C-notch, that’s a decision you’re making blind.
Key Takeaways
Matching kit scope and air management to your actual use case, not your Instagram feed, is what determines whether a C10 air suspension build lasts.
| Point | Details |
|---|---|
| Pick scope by goal | Full-chassis kits suit show builds; rear-only helpers suit towing; front-only suits mild lowering. |
| Size air management correctly | Undersized tanks and compressors are the leading cause of premature compressor failure. |
| Verify fitment before ordering | Measure wheel backspace, brake clearance, and axle housing before contacting any vendor. |
| Maintain the system | Check for overnight sag and constant compressor cycling to catch leaks early. |
| Buy from a supported vendor | Ozkonic Kustomz offers fitment templates, tech support, and a clear return policy for C10 kits. |
Table of Contents
- What Does a C10 Air Suspension Kit Actually Include?
- Which Kit Type Fits Your C10 Project?
- How Does Fitment Vary Across C10 Model Years?
- What Do You Gain and What Can Go Wrong?
- How Long Does Installation Take and What Does It Cost?
- Why Air Management Choices Determine Long-Term Reliability
- Which Setup Matches Your Goal: Show, Daily Driver, or Towing?
- How Do You Choose a Vendor Before You Buy?
- What Does Ozkonic Kustomz Recommend for a C10 Build?
- From Our Shop: What We See Go Wrong (and Right)
- Shop Ozkonic Kustomz for Vetted C10 Air-Suspension Parts
- Sources
What Does a C10 Air Suspension Kit Actually Include?
A complete kit is really six subsystems bundled together, and understanding each one is what separates a smart buyer from someone who gets surprised by a missing part three weeks into a build.
Air springs (also called airbags) replace your coil or leaf springs entirely. They need a compressor, tank, valve block, controller, and moisture management to function as a system rather than just a bouncy rubber donut under your frame, according to a breakdown of airbag suspension basics. Shocks come next, and they’re not optional extras. Some kits bundle a ShockWave-style integrated bag-and-shock unit into one part, which simplifies installation but can trade away some travel range compared to running a separate bag and a shock tuned specifically for your application.
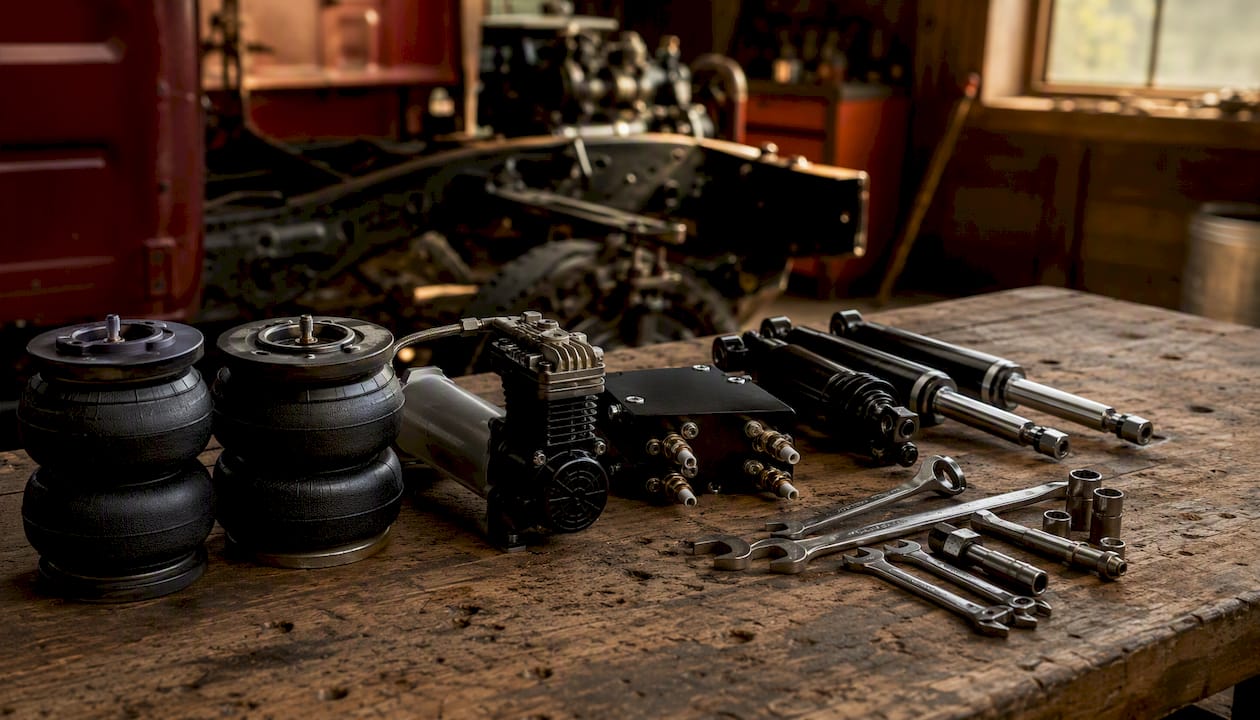
Brackets and perches are the unglamorous hardware that actually holds everything to your frame and axle. Tanks and compressors store and generate the air. Valve blocks and controllers decide how that air moves to each corner. Fittings and airlines route it all without leaking.
| Kit Scope | Springs Included | Shocks Included | Brackets | Air Management | Typical Add-Ons Needed |
|---|---|---|---|---|---|
| Front-only | Front corners | Sometimes | Front only | Rarely included | Rear kit later, matched controller |
| Rear-only helper | Rear corners | No | Rear only | Rarely included | Compressor, tank, valve block |
| Full-chassis | All four corners | Usually | Front and rear | Often bundled or optional | 4-link, C-notch, digital controller |
A few optional add-ons come up constantly once you start shopping seriously: 4-link or triangulated link kits for rear axle control, C-notch kits for frame clearance, Panhard or track bars to keep the axle centered, and water traps or moisture drains to keep your air lines from freezing or corroding.
The distinction between bolt-in and weld-required matters as much as anything on this list. Bolt-in kits use existing frame mounting points or add brackets with fasteners, which means a competent DIYer with basic tools can handle the job. Weld-required kits, especially anything involving a C-notch or custom 4-link mounts, need a welder, a frame jig or careful measuring, and honestly, some fabrication experience. Buying a bolt-in kit when your goal requires a notch is how people end up with mismatched parts sitting in a garage for six months.
Which Kit Type Fits Your C10 Project?
Not every C10 needs the same scope of kit, and buying more system than your goals require just adds cost and complexity you didn’t need.
Rear-only helper kits are the simplest entry point. They bolt in alongside your existing leaf springs and add load-leveling capability, which makes them the obvious choice if you tow a trailer or haul equipment and just want to stop your rear end from sagging. They won’t get you a lay-frame stance, and they’re not meant to.
Front-only coil-replacement kits swap out your front coil springs for air springs while leaving the rear stock or upgraded separately. This works for owners who want adjustable front ride height, maybe for a raked stance or better brake clearance, without committing to a full system yet.
Full-chassis kits with matched shocks and a 4-link are the real deal for anyone chasing a true show stance. These replace both front and rear suspension geometry, usually require the most fabrication, and deliver the widest ride-height range from daily-driver cruising height down to frame-on-the-ground.
Here’s how they stack up on the things that actually affect your wallet and your Saturday afternoons:
- Rear-only helper: lowest cost, easiest install, minimal maintenance, but no show-level drop
- Front-only: moderate cost, moderate install difficulty, good for mild lowering goals
- Full-chassis: highest cost, most complex install, maximum drop range and full drivability once tuned correctly
Pro Tip: If you’re building a daily driver, lean toward separate bag-and-shock setups tuned for your specific travel range. If you’re building strictly for shows and shorter drives, an integrated ShockWave-style unit saves install time and simplifies wiring, even though it sacrifices some travel.
How Does Fitment Vary Across C10 Model Years?
C10 fitment isn’t one-size-fits-all, and this is where a lot of otherwise-careful buyers get burned.
The early 1960s trucks, the 1967 through 1972 “Action Line” generation, and the 1973 through 1987 squarebody trucks all have different frame widths, spring mount locations, and rear axle configurations. A kit engineered for a 1970 short-bed won’t necessarily bolt into a 1985 squarebody without modification, even though both are technically “C10s.” This is exactly why fitment templates matter so much when you’re shopping, and why a C10 air suspension system built for the Action Line generation includes specific measurements for that body style.
Slammed builds almost always require some combination of the following: a C-notch to gain frame clearance over the rear axle, bed crossmember trimming so the bed floor doesn’t hit the axle housing at full compression, inner-fender clearancing for wider wheels and tires, and careful wheel backspace planning so the tire tucks without rubbing at ride height.
Before you order anything, measure and document these:
- Wheel backspace and tire width you’re planning to run
- Brake caliper clearance at your target ride height
- Bed floor height relative to the axle housing at full compression
- Axle housing width and spring mount locations
- Condition and location of your existing spring mounts
Roughly 40 percent of first-time slammed C10 builds report needing frame or fabrication work in a 2026 installer’s forum, which tracks with what shop-level guides describe as the norm rather than the exception once you’re chasing serious drop. RideTech’s own C10 install documentation notes that even a kit marketed as bolt-in commonly requires C-notching and four-link mounting during a real install, and that torque specs on every fastener need to be followed closely to avoid failures down the road, according to a detailed Chevy DIY installation walkthrough.
Pro Tip: Take photos of your spring mounts, axle housing, and inner fenders before you call a vendor for fitment advice. A tech support rep can answer questions in five minutes with photos that would take an hour of back-and-forth without them.
What Do You Gain and What Can Go Wrong?
Air suspension earns its reputation because the benefits are real, but so are the trade-offs, and pretending otherwise does buyers a disservice.
On the benefit side, you get adjustable ride height that goes from show-stance low to drivable in seconds, load-leveling that keeps your truck sitting level under a trailer tongue weight, and the ability to run larger wheels and tires without permanently altering your suspension geometry the way a static drop does. Ride comfort, when the system is tuned correctly with shocks sized for the travel range, tends to be smoother than a stiff static drop setup too.
The trade-offs are where people get surprised. Air suspension costs more upfront than a static drop, and it introduces more points of failure: airbags, compressors, valves, sensors, and wiring all have to work together, and any one can fail independently, according to an analysis of air suspension trade-offs. Over a decade of ownership, that added complexity can mean several thousand dollars more in maintenance compared to a simple coil or leaf spring setup, which is exactly why matching the technology to how you actually drive the truck matters so much.
Watch for these common failure modes:
- Leaking bags, usually from misaligned mounting or age-related rubber degradation
- Compressor overrun, where a small leak forces the compressor to cycle constantly until it burns out
- Corroded fittings, especially in climates with road salt or high humidity
- Failed height sensors or controller glitches, which show up as inconsistent ride height between corners
Pro Tip: Check for overnight sag every few weeks, and if you hear your compressor running when the truck’s been parked and untouched, that’s a leak, not a coincidence. Catching it early is a $20 fitting fix instead of a $200 bag replacement.
How Long Does Installation Take and What Does It Cost?
A full air-ride install follows a predictable sequence: front suspension first, then rear, then any C-notch or 4-link fabrication, then plumbing and wiring, then a full system bleed and height calibration before the truck ever leaves the lift.
For a DIY installer with a home garage and moderate mechanical skill, budget three to five full days for a complete front-and-rear kit, longer if welding or C-notch fabrication is involved. A professional shop with the right lift and experience can often complete the same job in one to two days, mainly because they’re not troubleshooting fitment issues for the first time.
Costs vary a lot depending on scope. Static drop kits cost less and are mechanically simpler, while a complete aftermarket air-ride system commonly falls in the $1,500 to $5,000-plus range installed, according to a comparison of static drop versus air ride for C10s specifically. Parts-only costs sit well below that range; labor, fabrication, and unexpected fitment fixes are what push the total up.
Budget for these hidden costs before you commit to a number:
- New shocks sized specifically for your air-travel range, not carried over from your old setup
- Extra brackets if your year truck needs non-standard mounting
- Wiring relays and heavier gauge wire for the compressor circuit
- A larger tank or stronger compressor if you plan to air up and down frequently
- A front-end alignment after ride height is finalized
Why Air Management Choices Determine Long-Term Reliability
The compressor, tank, and valve block get less attention than the airbags themselves, but they’re usually where reliability problems start.
An undersized tank forces your compressor to run more often to keep up with demand, and constant cycling is what burns compressors out early. Size your tank and compressor to match how often you actually plan to air up and down, according to shop-tested guidance on air ride system sizing for classic trucks. A show truck that airs down at every stop needs a bigger tank and stronger compressor than a daily driver that sets a ride height once and leaves it there most of the week.
Valve blocks come in two basic flavors: isolated corner valves that let each corner adjust independently for fine-tuning stance, and combined manifolds that are simpler but offer less precision. Controllers range from basic paddle switches that raise and reduce each corner manually to full digital systems with height presets you can save and recall at the push of a button.
Routing matters just as much as component choice. Air lines need to account for full suspension travel so they don’t stretch or kink at full compression. Water traps and tank drains keep condensation from freezing your lines in cold weather, and mounting your tank and compressor away from exhaust heat and sharp frame edges prevents avoidable failures.
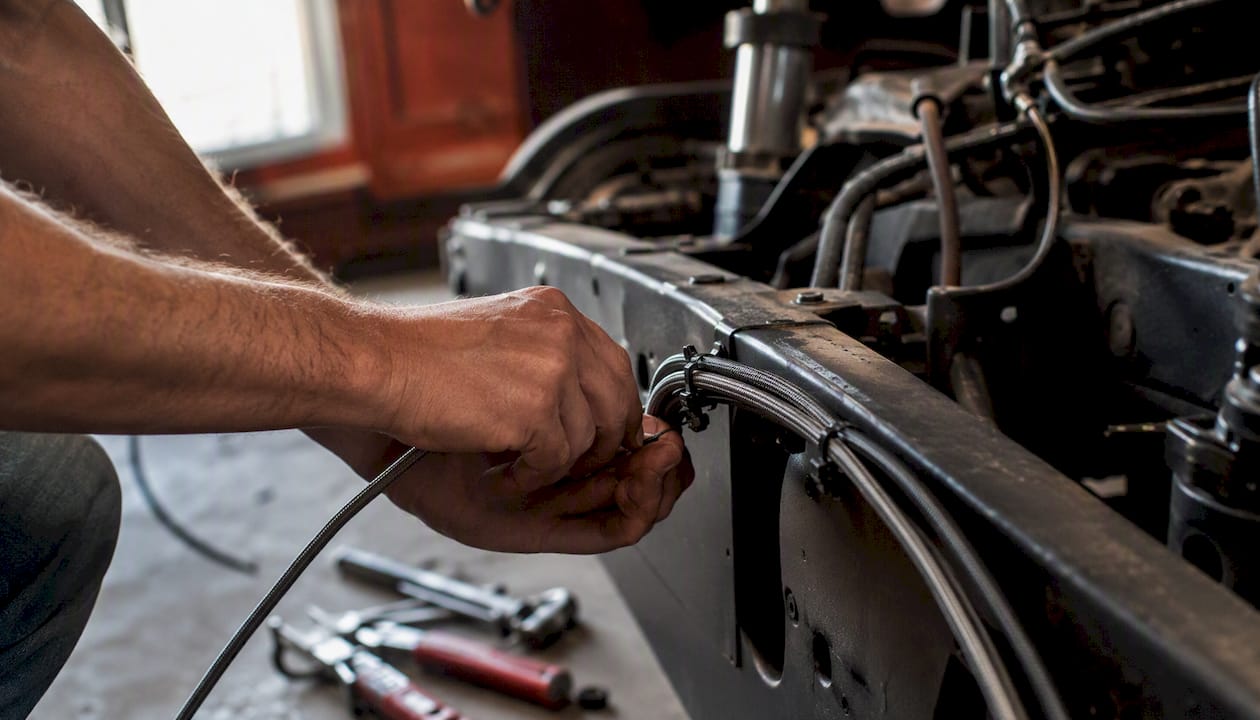
Pro Tip: Undersized wiring is one of the most common reasons compressors fail early. Run relays off a dedicated circuit with properly gauged wire and a solid ground, because voltage drop causes exactly the kind of intermittent controller behavior that gets misdiagnosed as a bad valve or bag. A wiring kit built for truck-mounted electrical systems solves most of this at the source.
Which Setup Matches Your Goal: Show, Daily Driver, or Towing?
Your air management and kit scope should follow your actual use case, not the most aggressive build you saw at a truck show last summer.
Show truck builds prioritize maximum drop and true lay-frame stance. That means larger tanks and stronger compressors to handle frequent airing up and down at events, heavy-duty brackets rated for the stress of bottoming out repeatedly, and an acceptance that some drivability gets sacrificed for the stance.
Daily driver builds flip that priority list. Moderate drop range, shocks matched precisely to full travel so they don’t blow out on regular potholes, a smaller tank sized for occasional height adjustment rather than constant cycling, and wiring robust enough to handle daily use without babying it.
Towing and utility builds are simpler by design. Helper bags or rear-only systems with load-rated bags control sag without pretending to increase your truck’s actual towing capacity, which air suspension never does regardless of what a bag can visually correct. Ride height range stays conservative because the goal is leveling, not lowering.
Whatever your goal, verify these before you finalize a build:
- Shock travel is sized correctly for your target ride-height range
- Axle and pinion angle stays within a reasonable range at your lowest setting
- Final ride-height presets get saved in your controller once tuning is complete
How Do You Choose a Vendor Before You Buy?
The single biggest predictor of a smooth install is whether your vendor actually supports the kit after you’ve paid for it, not just before.
Ask for these documents and promises up front: model-year specific fitment templates, clear notes on whether the kit is bolt-in or requires welding, installation instructions with actual torque specs, written warranty terms, and a return policy that doesn’t punish you for a fitment issue that wasn’t your fault.
Specific questions worth asking every vendor before you order:
- Does this kit require a C-notch or bed crossmember trim for my model year?
- Are the included shocks sized for the full air-travel range this kit produces?
- What’s the compressor duty cycle and tank volume included in this package?
- Do you offer fitment support or technical help before and after the sale?
Red flags in a product listing include missing shock specifications, no tank or compressor details listed anywhere, vague fitment language like “fits most trucks,” and zero installation resources beyond a parts list. A 2026 buyer survey found that roughly 1 in 4 C10 air-ride returns trace back to unclear fitment claims rather than defective parts, which tells you exactly where to focus your vetting.
Your actual next step: gather your measurements and photos from the fitment checklist earlier in this guide, then reach out to vendor support with them before you place an order. A five-minute conversation now saves weeks of troubleshooting later.
What Does Ozkonic Kustomz Recommend for a C10 Build?
Ozkonic Kustomz carries a curated lineup built around fitment accuracy rather than a generic one-size-fits-all catalog, which is exactly the gap most C10 owners run into when shopping big-box aftermarket sites.
The Ride Control air-spring kit is a bolt-in option built for owners who want a stance upgrade without a full fabrication project. It comes with mounting hardware for common applications and pairs naturally with aftermarket shocks sized for its travel range, making it a solid fit for daily drivers chasing a moderate drop.
For truck owners who tow or haul variable loads, the Air bag kit 11 GM PU 2500HD handles rear-only load leveling without touching your front suspension geometry. It’s a low-maintenance way to correct trailer sag on tow days.
The LoadLifter-style helper kit steps up from there for owners with heavier, sustained towing needs. It carries a higher load rating and more rugged construction, built for utility over show-level stance.
- Fitment support is available before and after purchase, so measurement questions don’t go unanswered
- A clear return policy protects buyers if a part doesn’t match their year truck
- Fast shipping keeps a project moving instead of stalling on backordered brackets
Common combos ordered together include a full kit paired with a larger tank for frequent airing, or a rear helper kit paired with a wiring kit to handle the added electrical load properly from day one.
| Point | Details |
|---|---|
| Best entry point | Ride Control air-spring kit for bolt-in installs on trucks wanting moderate drop and daily drivability. |
| Best for towing | Air bag kit 11 GM PU 2500HD handles rear sag correction without full chassis conversion. |
| Best for heavy loads | LoadLifter-style helper kit suits sustained towing over show-stance priorities. |
| Support matters | Fitment help and a clear return policy reduce the risk of ordering the wrong kit. |
From Our Shop: What We See Go Wrong (and Right)
The mistake we see most often in DIY installs is undersized wiring paired with an oversized ambition for how low the truck should sit. Someone builds a beautiful show stance, then wires the compressor with whatever gauge wire was already in the truck, and six months later they’re chasing an intermittent controller fault that turns out to be voltage drop the whole time.
Support doesn’t stop at checkout for us. Before a sale, that means confirming your model year and measurements match the kit you’re eyeing. After the sale, it means being available when you hit a fitment question mid-install, not just when something breaks.
One recent build that stuck with us: a customer with a squarebody daily driver wanted a moderate drop without sacrificing his 40-mile commute. We steered him toward matched shocks sized for his exact travel range instead of the max-drop hardware he originally asked for, and a year later he’s still driving it every day with zero suspension complaints.
Shop Ozkonic Kustomz for Vetted C10 Air-Suspension Parts
Ozkonic Kustomz sources every air-suspension component directly from vetted manufacturers, which means the fitment claims on the product page actually hold up when the parts arrive at your garage. That’s a real difference from big marketplace listings where you’re gambling on whether a “universal” kit fits your specific C10 year.
Every kit comes with straightforward return terms and access to fitment advice, so you’re not left guessing whether a bracket will clear your inner fender before you’ve committed to an order. If you’re planning a build around towing, browse the air ride suspension kits category to compare scope options, or check out towing-specific suspension upgrades if load leveling is your main goal.
Send your measurements and photos to our team before you order, and we’ll confirm fitment for your exact model year so there are no surprises when the box arrives. Browse the Ride Control air-spring kit to start planning your build today.
Sources
For readers who want to go deeper before ordering parts, these sources cover different angles of the same decision.
- Installing RideTech Air Suspension on a Chevy C10 - Chevy DIY
- Slam It: 5 Basics of Airbag Suspensions
- Pros and cons of air suspension
- Is air suspension worth it? The unfiltered truth about cost vs. comfort